
Introduction
Scope
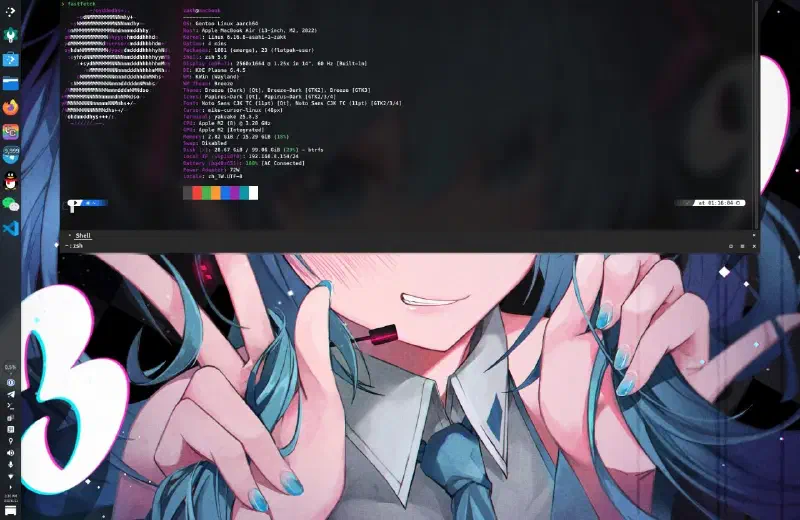
This guide installs native ARM64 Gentoo Linux on Apple Silicon Macs in the M1/M2 series.
Hardware compatibility
Supported devices: M1 and M2 MacBook, Mac mini, and related models.
Not yet supported: M3, M4, and M5 chips. Wait for updates from the Asahi Linux project.
The work of the Asahi Linux project team, especially chadmed, made the official Gentoo Asahi installation guide possible. The installation process is now substantially simpler.
This guide uses:
The official 2025.10 procedure
The official Gentoo Asahi Live USB, without a Fedora intermediate
Separate required and optional steps
A simplified procedure with an encryption option
Verified through 20 November 2025.
Target platform: Apple Silicon Macs in the M1/M2 series on ARM64. Initial setup uses the Asahi Linux bootloader, then switches to a full Gentoo environment.
Installation overview (simplified)#
Required steps:
- Download the official Gentoo Asahi Live USB image.
- Set up the U-Boot environment with the Asahi installer.
- Boot from the Live USB.
- Partition the disk and mount the filesystems.
- Extract Stage3 and enter the chroot.
- Install the Asahi support packages with the automation script.
- Reboot to finish the installation.
Optional steps:
LUKS encryption, recommended but not required
Custom kernel configuration; the default dist-kernel is sufficient
Audio configuration with PipeWire, as needed
Desktop-environment selection
This procedure creates a dual-boot macOS and Gentoo Linux ARM64 environment on the Mac.
Automation script
The asahi-gentoosupport automation script completes most configuration.
Prerequisites and notes#
Hardware requirements#
An Apple Silicon Mac (M1/M2-series chips only; M3/M4/M5 are not yet supported)
At least 80 GB of available disk space; 120 GB or more is recommended
A stable network connection over Wi-Fi or Ethernet
A backup of important data
Important warnings#
The installation includes advanced operations:
It changes the partition table.
It must coexist with macOS.
It involves disk encryption.
Linux support on Apple Silicon remains under development.
Known working features:
CPU, memory, and storage
Wi-Fi through Asahi Linux firmware
Keyboard, trackpad, and battery management
Display output on the internal panel and external monitors
USB-C / Thunderbolt
Known limitations:
Touch ID does not work.
macOS virtualization features are limited.
Some newer hardware features may not be fully supported.
M1/M2 GPU support is
linux-asahi, which is mostly stable. See Asahi's M1 and M2 feature-support matrices for individual feature limitations.
Additional existing English note: This guide assumes basic Linux knowledge. If problems arise, consult the official Gentoo Asahi Wiki.
0. Prepare the Gentoo Asahi Live USB#
Before proceeding, macOS must be version 13.5 or later. If it is earlier, upgrade macOS first.
0.1 Download the official Gentoo Asahi Live USB#
Official procedure: Use Gentoo's ARM64 Live USB directly; no Fedora intermediate is required.
Download the latest version:
curl -fLO https://chadmed.au/pub/gentoo/install-arm64-asahi-latest.isoTip: Official Asahi support is being integrated into the standard Live USB. For now, use the version maintained by chadmed.
0.2 Create the bootable USB#
Run on macOS:
# View the USB device name
diskutil list
# Unmount the USB device (assuming /dev/disk4)
diskutil unmountDisk /dev/disk4
# Write the image (rdisk is faster)
sudo dd if=install-arm64-asahi-latest.iso of=/dev/rdisk4 bs=4m status=progress
# Eject the USB when writing completes
diskutil eject /dev/disk4
1. Set up the Asahi U-Boot environment#
1.1 Run the Asahi installer#
Run in macOS Terminal: This command requires macOS 13.5 or later; first meet the prerequisite in Section 0.
curl https://alx.sh | shSecurity note
Visit https://alx.sh and inspect the script before running it.
1.2 Follow the installer steps#
In the installer:
- Choose an action: enter
r(Resize an existing partition to make space for a new OS). - Choose partition space: allocate at least 80 GB to Linux.
- Use a percentage such as
50%, or an absolute size such as120GB.
- Use a percentage such as
Tip: Keep the macOS partition so that firmware can be updated.
- Choose an operating system: select UEFI environment only (m1n1 + U-Boot + ESP).
» OS: <select the UEFI only option>
Official recommendation: Select UEFI only; a complete distribution is unnecessary.
- Set the name: enter
Gentooas the operating-system name.» OS name: Gentoo - Finish installation: record the on-screen instructions, then press Enter to shut down.
1.3 Finish Recovery-mode setup (critical)#
Restart procedure:
Wait 25 seconds so that the system fully shuts down.
Hold the power button until “Loading startup options...” or a spinning icon appears.
Release the power button.
Wait for the volume list, then select Gentoo.
The macOS Recovery interface appears:
If prompted to “Select a volume to recover,” select the macOS volume and click Next.
Enter the macOS user password for the FileVault user.
Follow the on-screen instructions to finish setup.
Troubleshooting
If the Mac loops during boot or asks to reinstall macOS, hold the power button until the system fully shuts down, then restart from step 1. You can also boot macOS, run curl https://alx.sh | sh, and choose p to retry.
2. Boot from the Live USB#
2.1 Connect and boot the Live USB#
- Insert the Live USB, directly or through a USB hub or dock.
- Start the Mac.
- U-Boot starts automatically:
After selecting “UEFI environment only,” U-Boot automatically boots GRUB from USB.
Wait two seconds for the automatic boot sequence.
If multiple systems exist, you may need to interrupt it and select manually.
Tip: To specify USB boot manually, run the following at the U-Boot prompt:
setenv boot_targets "usb"
setenv bootmeths "efi"
boot
2.2 Configure networking in the Live environment#
The Gentoo Live USB includes network tools.
Connect to Wi-Fi:
net-setupFollow the interactive prompts. Then verify the connection:
ping -c 3 www.gentoo.orgTip: Apple Silicon Wi-Fi is included in the kernel. If the connection is unstable, try a 2.4 GHz network.
Optional: remote access over SSH
passwd
# Set the root password
/etc/init.d/sshd start
ip a | grep inet
# Obtain the IP address
3. Partition and filesystem setup#
3.1 Identify disks and partitions#
Important warning
Do not modify the existing APFS container, EFI partition, or Recovery partition. Operate only in the space reserved by the Asahi installer.
View the partition layout:
lsblk
blkid --label "EFI - GENTO"
# Display the EFI partition
The output normally resembles:
NAME        MAJ:MIN RM   SIZE RO TYPE MOUNTPOINTS
loop0         7:0    0 609.1M  1 loop /run/rootfsbase
sda           8:0    1 119.5G  0 disk /run/initramfs/live
|-sda1        8:1    1   118K  0 part
|-sda2        8:2    1   2.8M  0 part
`-sda3        8:3    1 670.4M  0 part
nvme0n1     259:0    0 465.9G  0 disk
|-nvme0n1p1 259:1    0   500M  0 part
|-nvme0n1p2 259:2    0 307.3G  0 part
|-nvme0n1p3 259:3    0   2.3G  0 part
|-nvme0n1p4 259:4    0   477M  0 part
`-nvme0n1p5 259:5    0     5G  0 part
nvme0n2     259:6    0     3M  0 disk
nvme0n3     259:7    0   128M  0 disk
Identify the EFI partition (do not modify it):
livecd ~
# blkid --label "EFI - GENTO"
/dev/nvme0n1p4
# Do not modify the EFI partition
Recommendation
cfdisk recognizes Apple partition types and protects system partitions.
3.2 Create the root partition#
Assume free space begins at /dev/nvme0n1p5.
Method A: simple partitioning without encryption
# Use cfdisk to create a new partition
cfdisk /dev/nvme0n1
You will see a partition table similar to this:
                                            Disk: /dev/nvme0n1
                         Size: 465.92 GiB, 500277792768 bytes, 122138133 sectors
                       Label: gpt, identifier: 6C5A96F2-EFC9-487C-8C3E-01FD5EA77896
    Device                      Start            End       Sectors        Size Type
    /dev/nvme0n1p1                  6         128005        128000        500M Apple Silicon boot
    /dev/nvme0n1p2             128006       80694533      80566528      307.3G Apple APFS
    /dev/nvme0n1p3           80694534       81304837        610304        2.3G Apple APFS
    /dev/nvme0n1p4           81304838       81426949        122112        477M EFI System
>>  Free space               81427200      120827418      39400219      150.3G
    /dev/nvme0n1p5          120827419      122138127       1310709          5G Apple Silicon recovery
                        [   New  ]  [  Quit  ]  [  Help  ]  [  Write ]  [  Dump  ]
                                   Create new partition from free space
Steps:
- Select Free space → New.
- Use all available space, or specify a custom size.
- Select Type → Linux filesystem.
- Select Write, then enter
yesto confirm. - Select Quit.
Format the partition:
# Format as ext4 or btrfs
mkfs.ext4 /dev/nvme0n1p6
# Or
mkfs.btrfs /dev/nvme0n1p6
# Mount
mount /dev/nvme0n1p6 /mnt/gentoo
Method B: encrypted partitioning (optional, recommended)
# Create a LUKS2-encrypted partition
cryptsetup luksFormat --type luks2 --pbkdf argon2id --hash sha512 --key-size 512 /dev/nvme0n1p6
# Enter YES to confirm, then set an encryption passphrase
# Open the encrypted partition
cryptsetup luksOpen /dev/nvme0n1p6 gentoo-root
# Format
mkfs.btrfs --label root /dev/mapper/gentoo-root
# Mount
mount /dev/mapper/gentoo-root /mnt/gentoo
Parameters
argon2id: resists ASIC/GPU brute-force attacksaes-xts: the M1 AES instruction set provides hardware accelerationluks2: uses the LUKS2 format
3.3 Mount the EFI partition#
mkdir -p /mnt/gentoo/boot
mount /dev/nvme0n1p4 /mnt/gentoo/boot
4. Stage3 and chroot#
From here, follow the AMD64 Handbook through “Installing the kernel”; the Asahi support-package steps replace that kernel chapter.
4.1 Download and extract Stage3#
cd /mnt/gentoo
chronyd -q
date
# Use the official latest-stage3 txt file to obtain the current path automatically; wget does not support remote wildcards, so this method is required
STAGE3=$(wget -qO- https://distfiles.gentoo.org/releases/arm64/autobuilds/latest-stage3-arm64-desktop-systemd.txt | grep -m1 -E '^[0-9]{8}T[0-9]{6}Z/stage3-arm64-desktop-systemd-[0-9]{8}T[0-9]{6}Z\.tar\.xz ' | cut -d' ' -f1)
wget "https://distfiles.gentoo.org/releases/arm64/autobuilds/${STAGE3}"
wget "https://distfiles.gentoo.org/releases/arm64/autobuilds/${STAGE3}.asc"
# Verify the signature
gpg --verify stage3-*.tar.xz.asc stage3-*.tar.xz
# Extract and retain attributes
tar xpvf stage3-*.tar.xz --xattrs-include='*.*' --numeric-owner
4.2 Configure Portage#
mkdir --parents /mnt/gentoo/etc/portage/repos.conf
cp /mnt/gentoo/usr/share/portage/config/repos.conf /mnt/gentoo/etc/portage/repos.conf/gentoo.conf
4.3 Synchronize system time#
Before entering the chroot, ensure that system time is correct to avoid compilation or SSL-certificate errors:
Why
Package compilation needs correct timestamps.
SSL/TLS certificate validation depends on accurate system time.
Incorrect time can cause emerge failures or certificate errors.
4.4 Enter the chroot environment#
Mount the required filesystems:
cp --dereference /etc/resolv.conf /mnt/gentoo/etc/
mount --types proc /proc /mnt/gentoo/proc
mount --rbind /sys /mnt/gentoo/sys
mount --make-rslave /mnt/gentoo/sys
mount --rbind /dev /mnt/gentoo/dev
mount --make-rslave /mnt/gentoo/dev
mount --bind /run /mnt/gentoo/run
mount --make-slave /mnt/gentoo/run
Enter the chroot:
chroot /mnt/gentoo /bin/bash
source /etc/profile
export PS1="(chroot) ${PS1}"
4.5 Basic system configuration#
Configure make.conf for Apple Silicon:
Edit /etc/portage/make.conf:
nano -w /etc/portage/make.confAdd or change the following:
# vim: set language=bash;
CHOST="aarch64-unknown-linux-gnu"
# Apple Silicon-optimized compiler flags
COMMON_FLAGS="-march=armv8.5-a+fp16+simd+crypto -mtune=native -O2 -pipe"
CFLAGS="${COMMON_FLAGS}"
CXXFLAGS="${COMMON_FLAGS}"
FCFLAGS="${COMMON_FLAGS}"
FFLAGS="${COMMON_FLAGS}"
RUSTFLAGS="-C target-cpu=native"
# Keep build output in English; retain this setting when reporting errors
LC_MESSAGES=C
# Adjust for the hardware, for example an M2 Max has more cores
MAKEOPTS="-j4"
# Gentoo mirror; the R2 mirror is recommended and faster
GENTOO_MIRRORS="https://gentoo.rgst.io/gentoo"
# Default emerge options; compile at most three packages concurrently
EMERGE_DEFAULT_OPTS="--jobs 3"
# Asahi GPU driver
VIDEO_CARDS="asahi"
# Chinese localization support, optional
L10N="zh-CN zh-TW zh en"
# Keep a trailing newline at the end of the file
Synchronize Portage:
emerge-webrsyncSet the timezone:
# Set the Taiwan timezone, or replace it with your own timezone
ln -sf /usr/share/zoneinfo/Asia/Taipei /etc/localtime
Set locales:
# Edit locale.gen and uncomment the required locales
nano -w /etc/locale.gen
# Uncomment en_US.UTF-8 UTF-8
# If Chinese is needed, uncomment zh_CN.UTF-8 UTF-8
# Generate locales
locale-gen
# Select the default system locale
eselect locale set en_US.utf8
# Reload the environment
env-update && source /etc/profile && export PS1="(chroot) ${PS1}"
Create a user and set passwords:
# Create a user; replace <username> with the user name
useradd -m -G wheel,audio,video,usb,input <username>
# Set the user password
passwd <username>
# Set the root password
passwd root
5. Install Asahi support packages (core step)#
Official simplified procedure
This section replaces the Handbook's “Installing the kernel” chapter.
5.1 Method A: automated installation (recommended)#
Step 1: install git
# Synchronize the Portage repository for the first time
emerge --sync
# Install git, required to download the script
emerge --ask dev-vcs/git
Step 2: use the official asahi-gentoosupport script:
cd /tmp
git clone https://github.com/chadmed/asahi-gentoosupport
cd asahi-gentoosupport
./install.sh
The script automatically:
Enables the Asahi overlay
Installs the GRUB bootloader
Sets VIDEO_CARDS="asahi"
Installs asahi-meta, including the kernel, firmware, m1n1, and U-Boot
Runs
asahi-fwupdateand update-m1n1
USE flag conflicts
The script may request USE flag changes. Handle them as follows:
# When the script reports a USE flag conflict, interrupt it with Ctrl+C
# Then run:
emerge --autounmask-write <conflicting-package>
# Update configuration files
etc-update
# In etc-update, choose an appropriate option; -3 normally merges automatically
# Run the installation script again
cd /tmp/asahi-gentoosupport
./install.sh
When the script finishes, run:
emerge --ask --update --deep --changed-use @worldWhen it completes, continue with step 5.3, configuring fstab.
5.2 Method B: manual installation (advanced users)#
Step 1: install git and configure the Asahi overlay
# Synchronize the Portage repository for the first time
emerge --sync
# Install git for Git synchronization
emerge --ask dev-vcs/git
# Delete the old Portage database and switch to Git synchronization
rm -rf /var/db/repos/gentoo
tee /etc/portage/repos.conf/gentoo.conf << 'EOF'
[DEFAULT]
main-repo = gentoo
[gentoo]
location = /var/db/repos/gentoo
sync-type = git
sync-uri = https://mirrors.bfsu.edu.cn/git/gentoo-portage.git
auto-sync = yes
sync-depth = 1
EOF
# Configure the Asahi overlay with Git synchronization
tee /etc/portage/repos.conf/asahi.conf << 'EOF'
[asahi]
location = /var/db/repos/asahi
sync-type = git
sync-uri = https://github.com/chadmed/asahi-overlay.git
auto-sync = yes
EOF
# Synchronize all repositories
emerge --sync
Mirror note
Simplified-Chinese users: You can change the preceding sync-uri to the BFSU mirror https://mirrors.bfsu.edu.cn/git/gentoo-portage.git to accelerate synchronization.
For more mirror choices, see the mirror list.
Step 2: configure package.mask
Prevent Gentoo's official dist-kernel from replacing the Asahi version:
mkdir -p /etc/portage/package.mask
cat > /etc/portage/package.mask/asahi << 'EOF'
# Mask the upstream dist-kernel virtual to prevent it from forcing a kernel upgrade
virtual/dist-kernel::gentoo
EOF
Step 3: configure package.use
mkdir -p /etc/portage/package.use
# Asahi-specific USE flags
cat > /etc/portage/package.use/asahi << 'EOF'
dev-lang/rust-bin rustfmt rust-src
dev-lang/rust rustfmt rust-src
EOF
# Set VIDEO_CARDS
echo 'VIDEO_CARDS="asahi"' >> /etc/portage/make.conf
# GRUB platform must be set
echo 'GRUB_PLATFORMS="efi-64"' >> /etc/portage/make.conf
Step 4: configure the firmware license
mkdir -p /etc/portage/package.license
echo 'sys-kernel/linux-firmware linux-fw-redistributable no-source-code' > /etc/portage/package.license/firmware
Step 5: install rust-bin first
emerge -q1 dev-lang/rust-binStep 6: install the Asahi packages
# Install all required packages in one operation
emerge -q sys-apps/asahi-meta virtual/dist-kernel:asahi sys-kernel/linux-firmware
Tip: If
etc-updatereports configuration-file conflicts, select-3for an automatic merge.
Packages:
rust-bin: required first to compile Asahi kernel componentsasahi-meta: includes m1n1, asahi-fwupdate, U-Boot, and related toolsvirtual/dist-kernel:asahi: includes the Asahi kernel with patches not yet upstreamlinux-firmware: provides firmware for Wi-Fi and other hardware
Step 7: update firmware and bootloader
asahi-fwupdate
update-m1n1
Later updates
After updating the kernel, U-Boot, or m1n1, you must run update-m1n1.
Step 8: install and configure GRUB
# Install GRUB
emerge -q grub:2
# Install GRUB to the ESP; --removable is required
grub-install --boot-directory=/boot/ --efi-directory=/boot/ --removable
# Generate the GRUB configuration
grub-mkconfig -o /boot/grub/grub.cfg
Key configuration
The
--removableflag is required so the system can boot from the ESP.Both
--boot-directoryand--efi-directorymust point to/boot/.GRUB_PLATFORMS="efi-64"must be set in make.conf.
Step 9: update the system (optional)
emerge --ask --update --deep --changed-use @world5.3 Configure fstab#
Get the UUIDs:
# Root partition for an unencrypted ext4 or btrfs installation
blkid /dev/nvme0n1p6
# Decrypted root filesystem for an encrypted installation
blkid /dev/mapper/gentoo-root
# boot partition
blkid --label "EFI - GENTO"
Edit /etc/fstab:
nano -w /etc/fstab# Root partition; adjust for your configuration
UUID=<your-root-uuid> / ext4 defaults 0 1
# Or the encrypted version:
# UUID=<your-btrfs-uuid> / btrfs defaults 0 1
UUID=<your-boot-uuid> /boot vfat defaults 0 25.4 Configure encryption support (encrypted installations only)#
Applies when
Run this section only if you configured an encrypted partition in step 3.2.
Step 1: enable systemd cryptsetup support
mkdir -p /etc/portage/package.use
echo "sys-apps/systemd cryptsetup" >> /etc/portage/package.use/fde
# Rebuild systemd with cryptsetup support
emerge --ask --oneshot sys-apps/systemd
Step 2: obtain the LUKS partition UUID
# Get the UUID of the LUKS-encrypted container, not the filesystem UUID inside it
blkid /dev/nvme0n1p6
Example output:
/dev/nvme0n1p6: UUID="a1b2c3d4-e5f6-7890-abcd-ef1234567890" TYPE="crypto_LUKS" ...Record the LUKS UUID, for example a1b2c3d4-e5f6-7890-abcd-ef1234567890.
Step 3: configure GRUB kernel parameters
nano -w /etc/default/grubAdd or change the following. Replace <LUKS-UUID> with the UUID reported by blkid /dev/nvme0n1p6, and <decrypted-fs-UUID> with the UUID reported by blkid /dev/mapper/gentoo-root.
# Complete example; replace both UUID placeholders with actual values
GRUB_CMDLINE_LINUX="rd.luks.uuid=<LUKS-UUID> rd.luks.allow-discards root=UUID=<decrypted-fs-UUID> rootfstype=btrfs"
Parameters
rd.luks.uuid=<LUKS-UUID>: the LUKS encrypted-partition UUID, obtained withblkid /dev/nvme0n1p6rd.luks.allow-discards: passes SSD TRIM to the encryption layer, improving SSD performanceroot=UUID=<decrypted-fs-UUID>: the decrypted btrfs filesystem UUID, obtained withblkid /dev/mapper/gentoo-rootrootfstype=btrfs: the root filesystem type; change it toext4for ext4
Step 4: install and configure dracut
# Install dracut if it is not already installed
emerge --ask sys-kernel/dracut
Step 5: configure dracut to unlock LUKS
Create a dracut configuration file:
nano -w /etc/dracut.conf.d/luks.confAdd:
# Do not set kernel_cmdline here; GRUB overrides it
kernel_cmdline=""
# Add the modules required for LUKS and btrfs
add_dracutmodules+=" btrfs systemd crypt dm "
# Add required tools
install_items+=" /sbin/cryptsetup /bin/grep "
# Specify the filesystem; change this when using another filesystem
filesystems+=" btrfs "
Configuration
The
cryptanddmmodules support LUKS decryption.The
systemdmodule supports the systemd boot environment.The
btrfsmodule supports btrfs; useext4instead for ext4.
Step 6: configure /etc/crypttab (optional, recommended)
nano -w /etc/crypttabAdd the following and replace the UUID with the LUKS UUID:
gentoo-root UUID=<LUKS-UUID> none luks,discardTip: After configuration, the system automatically identifies the encrypted partition and prompts for unlock.
Step 7: regenerate the initramfs
# Obtain the current kernel version
dracut --kver $(make -C /usr/src/linux -s kernelrelease) --force
After updating the kernel
Run this command again after every kernel update to regenerate the initramfs.
Step 8: update the GRUB configuration
grub-mkconfig -o /boot/grub/grub.cfg
# Verify that initramfs is referenced correctly
grep initrd /boot/grub/grub.cfg
6. Finish installation and reboot#
6.1 Final configuration#
Set the hostname:
echo "macbook" > /etc/hostnameEnable NetworkManager for a desktop system:
emerge --ask net-misc/networkmanager
systemctl enable NetworkManager
Set the root password if not already set:
passwd root6.2 Leave the chroot and reboot#
exit
umount -R /mnt/gentoo
# When using encryption:
cryptsetup luksClose gentoo-root
reboot
6.3 First boot#
- U-Boot starts automatically.
- When the GRUB menu appears, select Gentoo.
- For an encrypted installation, enter the LUKS passphrase.
- The system should reach a login prompt.
The base system is installed.
7. Post-install configuration (optional)#
7.1 Network connection#
# Wi-Fi
nmcli device wifi connect <SSID> password <password>
# Or use nmtui
nmtui
7.2 Install a desktop environment (optional)#
Note
Before installing a desktop environment, switch to its system profile. This automatically sets many required USE flags.
Step 1: view and select a system profile#
# List all available profiles
eselect profile list
Find the complete target profile name in the current output and note its displayed number. Profile order changes with the Portage tree.
Select an appropriate profile:
# GNOME desktop: select the entry whose name ends in desktop/gnome/systemd
eselect profile set <profile-number>
# KDE Plasma desktop, recommended: select the entry whose name ends in desktop/plasma/systemd
eselect profile set <profile-number>
# Generic desktop environment such as Xfce: select the entry whose name ends in desktop/systemd
eselect profile set <profile-number>
Profile descriptions
desktop/gnome/systemd: automatically enables GNOME-related USE flags, including gtk, gnome, and waylanddesktop/plasma/systemd: automatically enables KDE-related USE flags, including qt6, kde, and plasmadesktop/systemd: base desktop USE flags, including X, dbus, and networkmanager
Step 2: update the system for the new profile#
After switching profiles, rebuild affected packages:
# Update all packages to apply the new USE flags
emerge -avuDN @world
Step 3: install a desktop environment#
Option A: KDE Plasma (recommended)
# Install the KDE Plasma desktop
emerge --ask kde-plasma/plasma-meta kde-apps/kate kde-apps/dolphin
# Enable the display manager
systemctl enable sddm
# Install common applications, optional
emerge --ask kde-apps/konsole \
             kde-apps/okular \
             www-client/firefox
Option B: GNOME
# Install the full GNOME desktop
emerge --ask gnome-base/gnome gnome-extra/gnome-tweaks
# Enable the display manager
systemctl enable gdm
# Install common applications, optional
emerge --ask gnome-extra/gnome-system-monitor \
             gnome-extra/gnome-calculator \
             www-client/firefox
Option C: Xfce (lightweight)
# Switch to the generic desktop profile whose name ends in desktop/systemd
eselect profile set <profile-number>
# desktop/systemd
# Update the system
emerge -avuDN @world
# Install Xfce
emerge --ask xfce-base/xfce4-meta xfce-extra/xfce4-pulseaudio-plugin
# Install and enable the display manager
emerge --ask x11-misc/lightdm
systemctl enable lightdm
Step 4: optimize desktop performance (optional)#
Enable video acceleration with the Asahi GPU:
# Check the VIDEO_CARDS setting
grep VIDEO_CARDS /etc/portage/make.conf
# It should include: VIDEO_CARDS="asahi"
# Install Mesa and the Asahi driver; normally already installed
emerge --ask media-libs/mesa
Enable font rendering:
# Install base fonts
emerge --ask media-fonts/liberation-fonts \
             media-fonts/noto \
             media-fonts/noto-cjk \
             media-fonts/dejavu
# Enable font hinting
eselect fontconfig enable 10-sub-pixel-rgb.conf
eselect fontconfig enable 11-lcdfilter-default.conf
Configure a Chinese input method:
# Install the Fcitx5 Chinese input method
emerge --ask app-i18n/fcitx-chinese-addons
Note
In the current version, app-i18n/fcitx-rime has been tested and does not work correctly. Use app-i18n/fcitx-chinese-addons instead.
The first desktop-environment installation is expected to take 2–4 hours, depending on CPU performance.
Use
--jobs 3or fewer to avoid exhausting memory.You can set
EMERGE_DEFAULT_OPTS="--jobs 3 --load-average 8"in/etc/portage/make.conf.
7.3 Audio configuration (optional)#
Asahi audio is provided by PipeWire. Install the package as root:
# Install Asahi audio support
emerge --ask media-libs/asahi-audio
Reboot, then sign in to the desktop session as the desktop user you created. In that session, run:
# Enable PipeWire services
systemctl --user enable --now pipewire-pulse.service
systemctl --user enable --now wireplumber.service
8. System maintenance#
8.1 Regular update procedure#
# Update the Portage tree, including the Asahi overlay
emerge --sync
# Or synchronize the Asahi overlay manually:
emaint -r asahi sync
# Update all packages
emerge -avuDN @world
# Remove unneeded packages
emerge --depclean
# Update configuration files
dispatch-conf
8.2 Required after each kernel update#
After updating the kernel
After every kernel update, run:
# Update m1n1 Stage 2, including devicetree
update-m1n1
# Regenerate the GRUB configuration
grub-mkconfig -o /boot/grub/grub.cfg
Why: m1n1 Stage 2 contains the devicetree blob, through which the kernel recognizes hardware. Without updating it, the system may fail to boot or lose functionality.
Automation
sys-apps/asahi-scripts provides an installkernel hook that runs these steps automatically.
8.3 Update firmware#
macOS system updates include firmware updates. Keep the macOS partition to obtain the latest firmware.
9. Common questions and troubleshooting#
Cannot boot from USB#
Possible cause: U-Boot's USB driver remains limited.
Resolution:
Try another USB flash drive.
Use a USB 2.0 device for better compatibility.
Connect through a USB hub.
Boot stalls or the screen is black#
Cause: m1n1, U-Boot, and the kernel do not match.
Resolution:
- Run the Asahi installer again in macOS.
- Select
pto retry the Recovery procedure. - Confirm that
update-m1n1was run in the chroot.
The encrypted partition cannot be unlocked#
Cause: Incorrect dracut configuration or UUID.
Resolution:
- Check
GRUB_CMDLINE_LINUXin/etc/default/grub. - Confirm the LUKS UUID:
blkid /dev/nvme0n1p6. - Regenerate the GRUB configuration:
grub-mkconfig -o /boot/grub/grub.cfg.
Wi-Fi is unstable#
Cause: WPA3 or the 6 GHz band may be the issue.
Resolution:
- Connect to a WPA2 network.
- Use the 2.4 GHz or 5 GHz band; avoid 6 GHz.
The trackpad does not work#
Cause: Firmware did not load, or there is a driver issue.
Resolution:
# Check firmware
dmesg | grep -i firmware
# Confirm that asahi-meta is installed
emerge --ask sys-apps/asahi-meta
10. Advanced techniques (optional)#
10.1 Notch configuration#
By default, the notch area is black. Add the parameter for the kernel version in use to the GRUB kernel parameters:
# Kernel 6.17 and earlier
apple_dcp.show_notch=1
# Kernel 6.18 and later
appledrm.show_notch=1
KDE Plasma optimization:
Add a full-width top panel aligned with the bottom of the notch.
On the left: Application Dashboard, Global menu, Spacer.
On the right: System Tray, Bluetooth, Power, Clock.
10.2 Custom kernel (advanced)#
The default Distribution kernel is sufficient. To customize it:
emerge --ask sys-kernel/asahi-sources
cd /usr/src/linux
make menuconfig
make -j$(nproc)
make modules_install
make install
update-m1n1
# Must be run
grub-mkconfig -o /boot/grub/grub.cfg
Keep a working kernel as a fallback.
10.3 Multiple kernel switching#
Multiple kernels can coexist:
eselect kernel list
eselect kernel set <number>
update-m1n1
# Must be run after switching
11. References#
Official documentation#
Gentoo Wiki: Project:Asahi/Guide: official guide
Gentoo AMD64 Handbook: the procedure is the same
Tools and scripts#
asahi-gentoosupport: automation script
Gentoo Asahi Releng: Live USB build tools
Community support#
Gentoo Chinese community:
Telegram group: @gentoo_zh
Telegram channel: @gentoocn
Official community:
IRC:
#gentooand#asahiat Libera.Chat
Further reading#
Asahi Linux Open OS Interoperability: the Apple Silicon boot process
Linux Kernel Devicetree: why
update-m1n1is requiredUser:Jared/Gentoo On An M1 Mac: a community installation guide
Closing#
Enjoy Gentoo on Apple Silicon!#
Basis#
This guide is based on the official Project:Asahi/Guide.
Three key points:
- Use the official Gentoo Asahi Live USB; no Fedora intermediate is required.
- The asahi-gentoosupport script automates most configuration.
- Run
update-m1n1after every kernel update.